Original Technology by Revealer
In industrial scenarios such as high-speed visual measurement, robot positioning, and automated quality inspection, the High Speed Camera has become a critical tool thanks to its non-contact measurement, high temporal resolution, and high spatial accuracy.
However, in real production environments, factors such as temperature changes, mechanical vibrations, and lens instability inevitably cause parameter drift—including shifts in intrinsic parameters (focal length, principal point) and extrinsic parameters (position, orientation).
Once these parameters drift, the geometric relationship of imaging changes, resulting in amplified measurement errors that directly affect 3D reconstruction and dimensional accuracy.
Traditional approaches to correcting parameter drift generally rely on offline calibration, which suffers from several limitations:
1. Laboratory Calibration — involves detaching the High Speed Camera and lens and sending them to a lab for calibration using standard targets. This leads to production downtime, high cost, and poor timeliness.
2. Structural Reinforcement — includes vibration isolators, rigid frames, or thermal insulation covers. These help but cannot prevent drift at the source and are difficult to retrofit into existing lines.
3. Manual On-Site Calibration — operators temporarily place calibration plates during maintenance windows, but this method is inherently delayed and cannot respond to real-time parameter changes.
To overcome the limitations of traditional calibration methods, the algorithm engineering team at Agile Device developed an innovative real-time on-site calibration technology, designed specifically for dynamic parameter drift compensation without halting production.
2.1 Key Innovations
This technology introduces a high-precision reference object, such as a checkerboard plate, installed directly on the production line (Fig. 1).
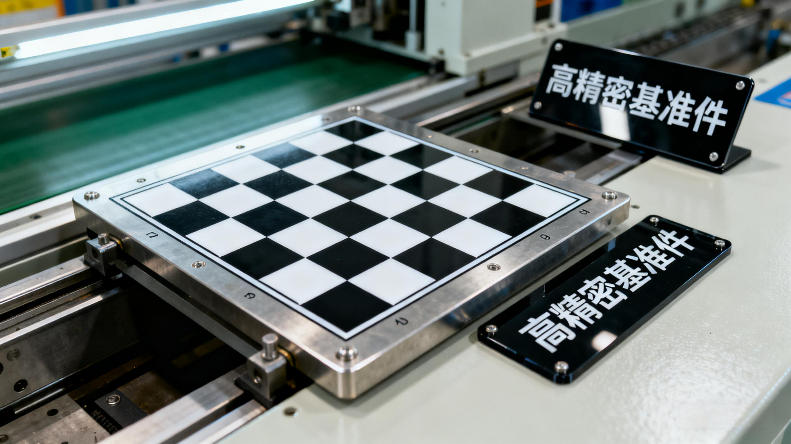
Fig.1
The reference object is rigidly fixed to the production structure, remains unchanged during operation, and provides a 0.001 mm precision level, serving as an absolute geometric baseline.
The High Speed Camera continually captures images of this reference plate. Using Revealer’s enhanced algorithm pipeline—based on Feature Extraction & Matching and Affine Transformation Models—the system continuously calculates real-time parameter drift.
Feature Extraction & Matching (Fig. 2):
Identifies and aligns key feature points between the current image and the stored baseline.
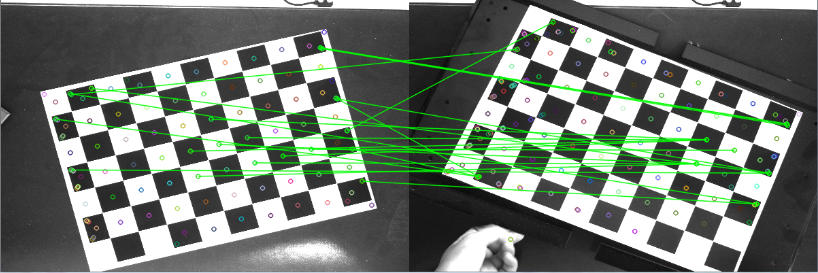
Fig. 2
Affine Transformation (Fig. 3 & 4):
Quantifies geometric deformation.
Given original coordinates (x, y) and transformed coordinates (x’, y’), the model determines displacement (Δx, Δy).
By computing these deviations, the system determines how far the camera’s view has shifted relative to the baseline.
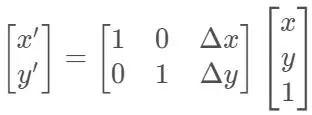
Fig. 3
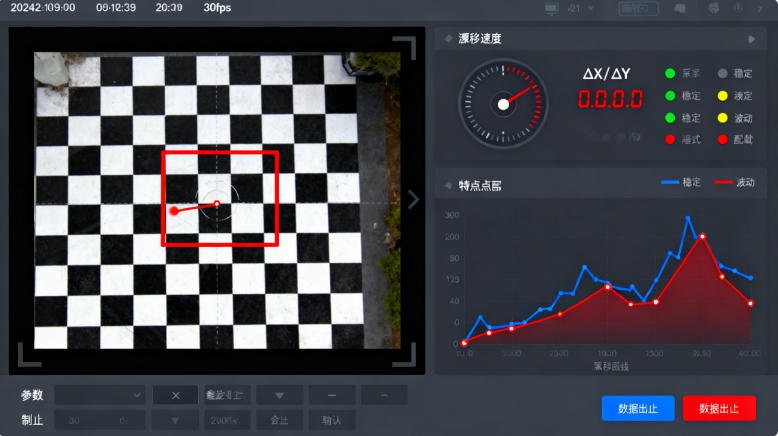
Fig. 4
Using this drift information, the algorithm automatically updates the camera’s intrinsic and extrinsic parameters, ensuring sustained measurement stability without human involvement.
2.2 Differentiated Advantages
Compared with traditional offline calibration methods, this real-time on-site calibration solution provides significant advantages in productivity, cost, and precision:
Efficiency & Cost
No need to halt production.
Each calibration cycle can be completed in less than 5 minutes.
Eliminates hidden costs associated with production downtime.
Precision
After compensation, measurement error remains within 0.005 mm.
Ensures consistent accuracy regardless of environmental fluctuations.
Environmental Adaptability
Designed for high-vibration, temperature-variable, and harsh industrial environments.
Dramatically enhances system robustness.
In a real industrial measurement scenario, the production line experienced severe mechanical vibrations. The captured images from the High Speed Camera showed noticeable jitter (Fig. 5), making accurate measurement impossible.
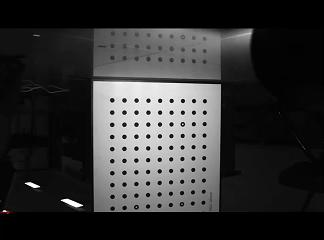
Fig.5
After deploying the real-time calibration system:
The visual measurement environment became significantly stabilized (Fig. 6).
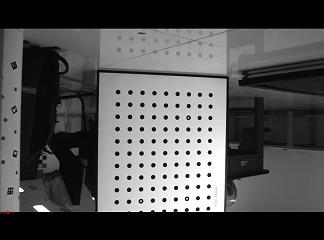
Fig.6
Angle deviation of the dot array: 0.0433° standard deviation (Fig. 7).
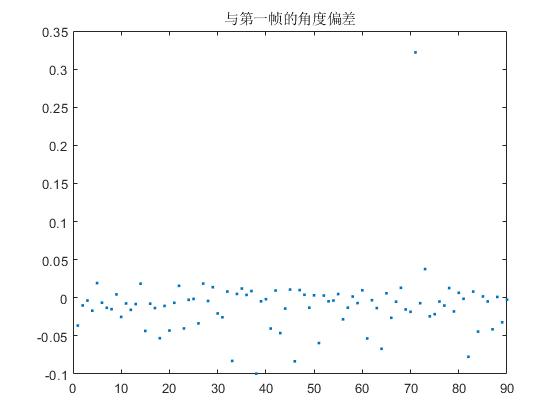
Fig.7
Distance deviation: 0.3341 px standard deviation (Fig. 8).
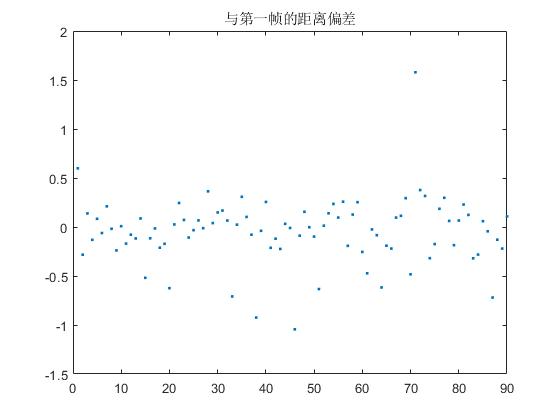
Fig.8
The results confirm that image jitter was suppressed to sub-pixel levels, satisfying demanding industrial accuracy requirements and proving the reliability of this drift-compensation technology.
By adopting this real-time on-site calibration technology, industrial users can continuously monitor and compensate intrinsic and extrinsic parameters of High Speed Cameras. The solution—powered by Revealer algorithms and engineered by Agile Device—delivers:
High efficiency and low operational cost
High precision and reliability
Strong adaptability to complex industrial environments
This technology brings substantial value to high-speed measurement applications in:
3C electronic precision component inspection
Lithium-battery stacking manufacturing
Display panel inspection
Automotive body welding measurement
Robot positioning and industrial automation
It offers a robust, real-time, and maintenance-free approach to addressing parameter drift, ensuring reliable measurement performance across high-speed production lines.
