In the world of materials testing, structural analysis, and mechanical engineering, accurate strain measurement is fundamental. For decades, electrical resistance strain gauges have been the industry standard for point-based measurements. However, with the advent of optical measurement technologies, Digital Image Correlation (DIC) has emerged as a powerful alternative for full-field analysis.
At Revealer Technologies, we've helped thousands of engineers and researchers navigate this technological transition. This comprehensive guide compares these two fundamentally different approaches, helping you make an informed decision for your specific application.
How They Work:
Strain gauges operate on the principle that the electrical resistance of a conductor changes when it's mechanically deformed. A fine wire or foil pattern is bonded directly to the test specimen. As the specimen deforms, the gauge deforms with it, changing its electrical resistance proportionally to the strain.
Key Characteristics:
Measurement Type: Point-based (single location)
Output: Electrical signal proportional to strain
Installation: Surface bonding required (critical skill-dependent)
Temperature Sensitivity: Requires compensation
Fatigue Life: Limited (typically 10⁶ cycles)
Cost per Point: Low to moderate ($20-$200 per gauge)
How It Works:
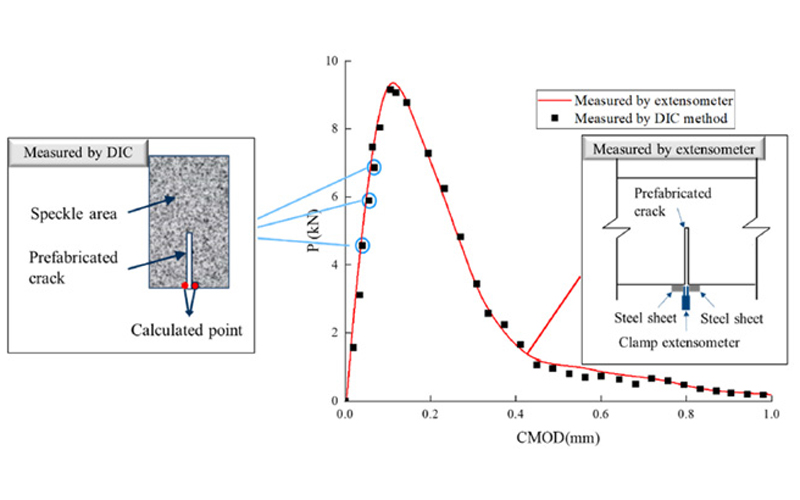
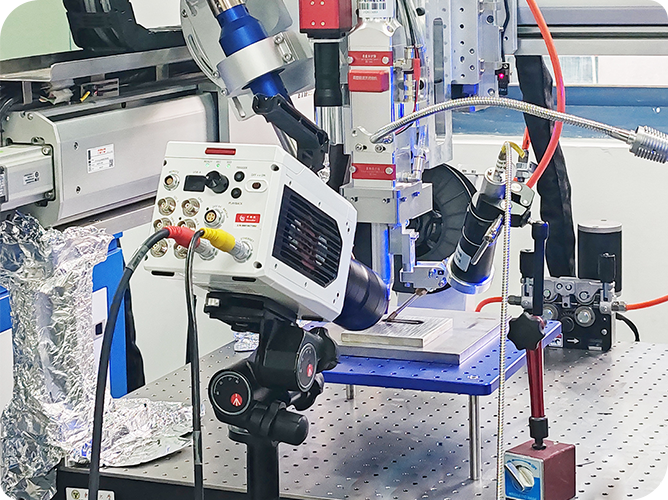
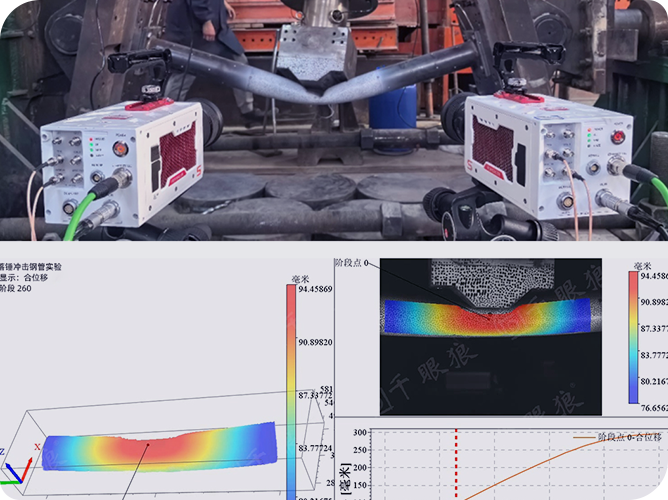
DIC is a non-contact optical technique that tracks the movement of a random speckle pattern applied to the specimen surface. Using one or more calibrated cameras, the system captures images before and during deformation, then uses sophisticated algorithms to calculate full-field displacement and strain.
Key Characteristics:
Measurement Type: Full-field (thousands to millions of points)
Output: Displacement and strain maps
Installation: Non-contact (surface preparation still required)
Temperature Sensitivity: Minimal (with proper calibration)
Fatigue Life: Unlimited (non-contact)
Cost per Point: Extremely low for full-field data
Parameter | Strain Gauges | Digital Image Correlation (2D) | Digital Image Correlation (3D) |
Measurement Type | Point measurement | Full-field (in-plane) | Full-field (3D) |
Strain Accuracy | ±1-5 με (microstrain) | ±50-200 με | ±50-200 με |
Displacement Accuracy | Not directly measured | ~0.01 pixels | ~0.01 pixels |
Spatial Resolution | ~1-10 mm² | ~1-100 pixels | ~1-100 pixels |
Temporal Resolution | kHz to MHz | Limited by camera frame rate | Limited by camera frame rate |
Maximum Strain | Typically 2-5% | Unlimited | Unlimited |
Temperature Range | Limited by adhesive | Limited by camera/optics | Limited by camera/optics |
Setup Time | Hours (per gauge) | Minutes to hours | Hours |
Data Density | Single point | Thousands to millions of points | Thousands to millions of points |
Applications: Vibration analysis, impact testing (ballistic events), rotating machinery
Why Strain Gauges Win:
kHz to MHz sampling rates possible
Direct electrical output for real-time monitoring
Minimal phase lag
Example: Monitoring blade vibrations in jet engines at 50,000 RPM
Applications: Measurements inside structures, embedded in composites, internal components
Why Strain Gauges Win:
Can be embedded during manufacturing
Wireless telemetry options available
Small form factor for confined spaces
Example: Measuring stresses inside concrete structures
Applications: Structural health monitoring, bridges, pipelines, civil infrastructure
Why Strain Gauges Win:
Low power consumption
Proven long-term reliability (decades)
Environmental sealing options
Example: Continuous monitoring of offshore wind turbine foundations
Applications: Gas turbine components, exhaust systems, high-temperature processing
Why Strain Gauges Win:
Specialized gauges available up to 1000°C+
Direct bonding provides good thermal contact
Example: Measuring thermal stresses in aircraft engine components
Applications: Routine quality control, simple validation tests, educational purposes
Why Strain Gauges Win:
Lower initial investment
Simple data acquisition requirements
Well-understood technology with extensive literature
Applications: Stress concentration analysis, crack propagation, composite material testing
Why DIC Wins:
Captures strain gradients and concentrations
Identifies unexpected hot spots
Provides complete strain tensor information
Example: Analyzing strain distribution around a bolt hole in an aircraft component
Applications: Automotive body panels, aircraft wings, large-scale structures
Why DIC Wins:
No wiring or installation per measurement point
Scales easily to large areas
Handles curved and complex surfaces
Example: Measuring full-field deformation of an entire car door during crash simulation
Applications: Material property mapping, heterogeneous material testing, biomaterials
Why DIC Wins:
Measures Poisson's ratio directly from single test
Captures anisotropic material behavior
Identifies local material variations
Example: Characterizing strain distribution in 3D-printed functionally graded materials
Applications: Delicate materials, high-rate testing, elevated temperatures, rotating components
Why DIC Wins:
No added mass or stiffness
No risk of gauge debonding
Suitable for hostile environments
Example: Measuring strain on thin polymer films during high-speed manufacturing
Applications: Combined mechanical-thermal testing, multi-axis loading, validation of FEA models
Why DIC Wins:
Easily synchronized with thermal cameras
Correlates with multiple loading parameters
Provides rich data for FEA correlation
Example: Thermo-mechanical testing of electronic components
Strategy: Use strain gauges as "truth" reference points within a DIC measurement field
Benefit: Validates DIC accuracy at specific locations
Example: Aerospace component testing where both point accuracy and full-field data are critical
Strategy: DIC for global behavior, strain gauges for local high-frequency detail
Benefit: Combines global context with local precision
Example: Wind turbine blade testing during dynamic loading
Strategy: Independent measurement systems for mission-critical applications
Benefit: Provides measurement redundancy and confidence
Example: Nuclear power plant component monitoring
Cost Component | Strain Gauges (10 points) | 2D DIC System | 3D DIC System |
Hardware | $2,000 - $10,000 | $15,000 - $40,000 | $30,000 - $100,000+ |
Installation Equipment | $500 - $2,000 | Minimal | Minimal |
Software | $1,000 - $5,000 | $5,000 - $20,000 | $10,000 - $30,000 |
Training | $500 - $2,000 | $1,000 - $5,000 | $2,000 - $10,000 |
Total Initial | $4,000 - $19,000 | $21,000 - $65,000 | $42,000 - $140,000 |
Cost Factor | Strain Gauges | DIC Systems |
Consumables per Test | $200 - $2,000 (gauges, adhesives) | $50 - $500 (speckle materials) |
Setup Time | 1-8 hours per gauge | 1-4 hours per test setup |
Analysis Time | 1-2 hours per gauge | 2-8 hours for full-field data |
Reusability | Single use typically | Infinite reuse |
Cost per Data Point | High | Very Low |
For laboratories conducting:
< 50 tests annually: Strain gauges often more cost-effective
50-200 tests annually: DIC begins to show ROI
> 200 tests annually: DIC provides significant cost savings
Strain Gauges:
Requires artisanal skill for proper installation
Critical surface preparation techniques
Wiring and soldering expertise
Signal conditioning knowledge
Digital Image Correlation:
Optical system alignment and calibration
Speckle pattern optimization
Software operation and data processing
Understanding of optical limitations
Strain Gauges:
Humidity: Requires moisture protection
Temperature: Compensation circuits needed
EMI/RFI: Shielding may be required
Chemical Exposure: Protective coatings available
Digital Image Correlation:
Lighting: Controlled lighting essential
Vibration: System must be isolated
Line of Sight: Must be maintained
Temperature: Air turbulence can affect measurements
Strain Gauges:
Simple time-series data
Easy to archive and process
Standard file formats
Minimal storage requirements
Digital Image Correlation:
Large image datasets (GB to TB scale)
Complex post-processing requirements
Specialized visualization needs
Significant storage infrastructure
DIC Preferred for: Composite material testing, full-scale component validation, thermal-mechanical testing
Strain Gauges Preferred for: Flight testing, embedded monitoring, high-frequency vibrations
Hybrid Approach: Common for critical component certification
DIC Preferred for: Crash testing, sheet metal forming, full-vehicle deformation
Strain Gauges Preferred for: Engine component testing, durability monitoring
Trend: Rapid migration toward DIC for most applications
Strain Gauges Preferred for: Long-term structural health monitoring
DIC Preferred for: Laboratory-scale model testing, failure analysis
Note: DIC gaining ground for field applications with portable systems
DIC Preferred for: Soft tissue mechanics, implant testing, biomaterial characterization
Strain Gauges Limited to: Hard tissue or embedded applications
Growth Area: DIC for in-vitro and ex-vivo tissue testing
DIC Preferred for: Drop testing, flexible display analysis, component warpage
Strain Gauges Used for: Specific internal component monitoring
Advantage: DIC's non-contact nature ideal for delicate assemblies
Based on our experience with thousands of measurement applications, here's our practical guidance:
You need measurements at a few specific, known locations
High-frequency data (>1 kHz) is required
The environment prevents optical access
Budget constraints are primary
You have experienced gauge installation technicians
You need to understand full-field strain distributions
The specimen has complex geometry or loading
You're testing new materials with unknown behavior
You need to correlate with FEA or other simulation tools
The cost of multiple strain gauge installations exceeds DIC investment
Revealer offers integrated solutions that combine:
DIC Systems with built-in interfaces for strain gauge inputs
Simultaneous data acquisition from optical and electrical sensors
Unified software for correlated analysis
Training programs covering both technologies
Wireless and energy-harvesting gauges for remote monitoring
Printed electronics for conformable, large-area sensors
Nanomaterial-based gauges with improved sensitivity
Higher speed systems approaching strain gauge temporal resolution
Stereo-DIC on chip for miniaturized systems
AI-enhanced analysis for automated defect detection
Integrated multi-physics combining DIC with thermal, acoustic, and other measurements
Fiber optic sensors with DIC correlation
Digital twins with real-time measurement integration
Augmented reality interfaces for field measurements
The decision between Digital Image Correlation software and strain gauges isn't about which technology is "better"—it's about which is better for your specific application.
Choose Strain Gauges if your primary needs are:
Point measurements at known locations
High-frequency dynamic data (>1 kHz)
Long-term, embedded monitoring
Limited initial budget
Measurements in optically inaccessible locations
Choose Digital Image Correlation if your primary needs are:
Full-field strain visualization
Measurements on complex geometries
Non-contact requirements
Understanding strain gradients and concentrations
Data for FEA validation and correlation
For most modern materials testing and research applications, DIC provides more comprehensive data and better return on investment over time. While the initial cost is higher, the information density and flexibility often justify the investment.
However, strain gauges remain irreplaceable for specific applications where their unique advantages are critical.
Evaluate your true data needs—not just immediate requirements but future applications
Calculate total cost of ownership—not just initial purchase price
Consider team capabilities—available skills and training requirements
Plan for the future—technology roadmaps and scalability
Test before committing—many suppliers (including Revealer) offer evaluation systems
